RECORDING the Hammond Organ
North Suburban HAMMOND ORGAN Service

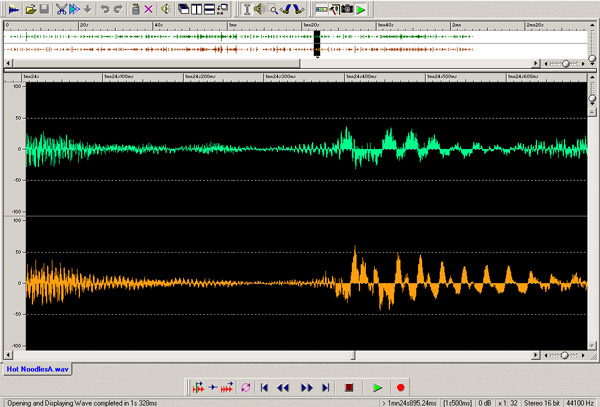
Figure 16. A much closer look at the audio tracks. Up near the top of the picture, approximately in the center, there's an overview of the track in which you see a small vertical black bar. In the main portion of the picture is a magnified view of just the portion of the track included in the vertical bar. This gets us in for close look at an audio track. Here we've singled out a small region in which there might be something that needs a little tweaking. Try doing this with audio tape!
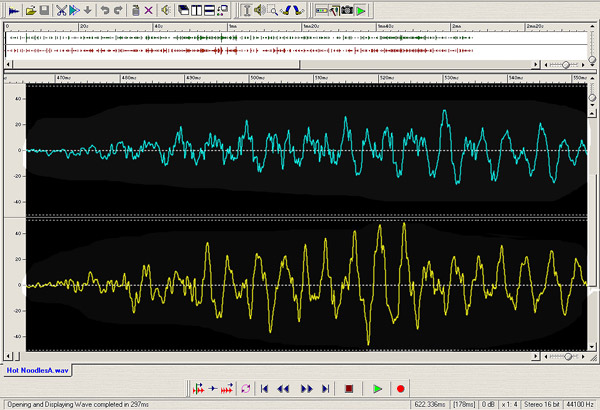
One this page we use a software-based computer sound editor to examine a stereo audio track in detail, showing how we can single out individual sonic events on a recording. The next picture below is a much closer look. Here we are looking at the waveform in sufficient detail to see individual cycles of the highest frequencies present. Having this degree of precision allows us to go in and find extraneous noises such as random pops and crackles caused by capacitors in older electronic instruments that are beginning to deteriorate. While refurbishing the instrument is the preferred way to correct this problem, it can be done in the recording process when we can access audio tracks at this level of precision.

Figure 17. Here, we are down to the actual waveform. This of course represents the composite of all of the different frequencies that make up the audio tracks, but it's possible to single out very tiny sections. If a track contained a sudden click, for example, it would show up as a big spike. After a little practice, it becomes easy to look at these squiggles and develop a good understanding of what belongs and what is extraneous. Also at this level, we can single out sections and change their volume if necessary. Notice that the lower track (Yellow) is bigger than the upper. This means that it is louder in the section where it's bigger. We can easily select just the louder portion and then knock it down by a decibel or two, making it balance with the other track.
If you are using an older Hammond strictly as a recording instrument, you can get by with recording tweaks and tricks to get rid of annoying noises from the instrument's electronics. But, if you are also using the instrument for performance and recitals, then the obvious choice is to have the instrument put into top condition. The capacitors that electronics suppliers have today are much better than those made fifty or more years ago. Their internal insulation holds up much better, and the outer casings of new capacitors are much more impervious to moisture and other contaminants that caused the original capacitors to fail after 20 years or so. Also it is worth mentioning that many older capacitors do not like to be frozen. If you are using an older Hammond that was stored for many years in an unheated barn or garage, the odds are today pretty much 100% in favor of finding at least a few capacitors that will fail within the first week after you resume using this instrument. Capacitors, for the most part, especially the ones that you find by the hundreds in some instruments, are pretty inexpensive, and the improvement in instrument sound and performance that results from replacing the original ones is well worth the effort and expense.
There is a lot more that I could add to this article but I'm only going to illustrate one more thing, and that is how we can make individual partial recordings of a complete song at different times, and then put them together into a seemless recording that has no discernable breaks or interruptions.
Back to Page 10. Page 11. Go to Page 12.